The goal of today’s lesson is to teach students the basics of how to create and share a Google Doc.
- students first need to learn to navigate to Google Drive. One way they can get there is to type drive.google.com into the address bar.
2. Another way students can get to Google Drive is by opening the Google Home Page and clicking on the waffle-looking icon by their profile in the top right corner of the screen.
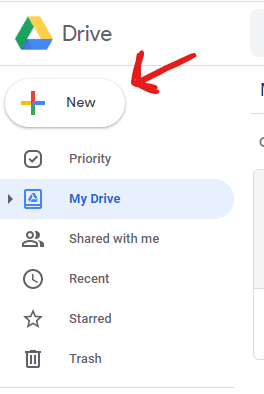
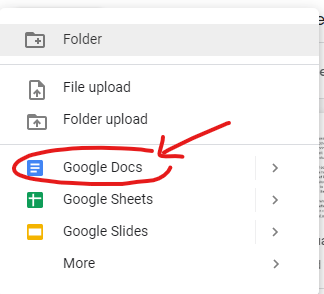
3. Once in their Google Drive, they can create a new doc by clicking the “New” button and they navigating down to the “Docs” symbol.
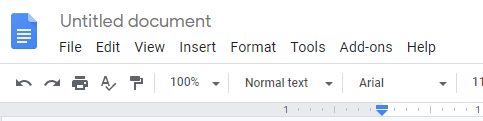
Now students will have created a new Google Doc. The first thing they should do is give their doc a title by clicking in the title location at the top left of the doc. By default, this will say “Untitled document”.
Let’s title this doc “My first Google Doc”. Click on the title to change it. Then, click back down into the “body” of your doc. Go ahead and write a quick thank you note to your teacher for being so awesome.
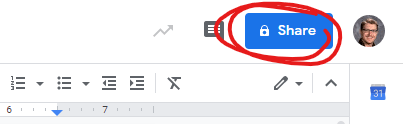
Once your message is finished, we need to share it with your teacher. You should see a blue “Share” button in the top right corner of the screen. Go ahead and click it.
You’ll need to start typing in the person’s name you want to share the doc with. In most cases, the name will pop up after you start typing a few letters.
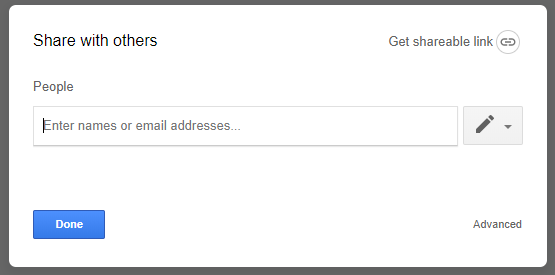
Click “Send” and you’re done. Congratulations! You just created and shared your first Google Doc!
If we have time, we’ll do one more bonus activity. One of the cool things about Google Docs is that you can have multiple people working on a doc at once. This allows for real-time collaboration. Let’s try to write a story together all working on the same document at once.
Open “3rd Grade Group Story Doc” and we’ll see if we can all get on at the same time. We’ll go around the room and we’ll each add a word in order to create a short funny story.
